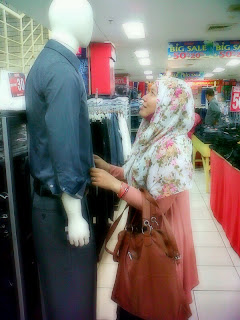
Foto

Kamis, 25 Desember 2014

Depresi ringan

Mei 2020 ditengah wabah corona

Akhir tahun 2014.... Setelah kepergian Almarhumah ibuku.... Keinginan aku untuk menulis secara perlahan menghilang.

  Aku kembali tinggal bersama orang tuaku dalam hal ini ayahku,  mengambil beban yang selama ini ditanggung ibuku menjaga Ayahku karena beliau mempunyai riwayat hipertensi dan diabetes, menjaga kucing kucingku karena mereka pasti merasa kehilangan

Kehilangan dosok seorang ibuku ketika engkau masih sendiri kembali Membuatku menjadi seorang introvert parah,  tidak ada keinginan untuk bersosialisasi keluar,  membuat menghindari teman-teman cara perlahan.

 di awal semuanya perubahan ini membuatku mengalami depresi ringan,  terutama ketika keluarga besar mencoba menjodohkan aku dengan seseorang,  aku ketakutan depresiku sempat kambuh dan membuatku menyalahkan diriku sendiri kenapa aku hidup di dunia,  walau aku tau makaud baik mereka semua.

tapi perlahan aku bangkit karena aku sadar bahwa  semua dapat berubah dengan keinginan ku sendiri tentunya dengan Ridho Illahi.
Berlahan aku membuka diri... Tidak merasakan ketakutan ketika berada didalam rumah....mulai tidak membenci diriku sendiri....

Salah satu yg berperan penting dlm mengatasi depresiku adalah kucing kucingku... Itulah kenapa aku tidak bisa jauh dari mereka.... 

Kamis, 15 Agustus 2013

hatiq

bulan bulan ini aq kembali stress, masalah keluarga dan masalah hati......wkwkwkwkwk, baru punya niat mikirin diri sendiri masalah besar kembali datang, astaghfirullah....kembali mengurungkan niat memikirkan diri sendiri....semangat ya ukhti..keep fighting...

Rabu, 14 Agustus 2013

Idul Fitri 1434 H

Seperti tahun tahun sebelumnya keluarga besar Ashari Suud...kumpul bersama dirumah om iis dikarenakan ombai berdiam disana...

selesai sholat iid didaerah masing masing...ayah duluan ketempat ombai, kami (saya< ibu< theo dan qiqi) menyusul, dan dikarenakan ayuk rina dan mama ngak ada tebengan jadi kami memutuskan kalau saya memboceng yuk rina dan ibu membonceng mama...

nyampe disana ternyata sudah ada keluarga tante sol-om husein beserta anak anaknya yaitu chandra dan Ikhsan....

baru setelah kami datang keluarga alm wak muk yaitu debi, dewi alias ira, doni dan istri (septi) berserta anak mereka rizqi...

dan disusul keluarga ama ujang-tante yeni berserta anak mereka zaskia, biyu dan farhan...


Taqoballallahu minna wa minkum
Taqoballallah ya karim....

Jumat, 05 Juli 2013

Crue cewek keswankan refreshing...

ini awalnya ide dari tia dan ibu Defri, mau jalan -jalan kepalembang sekalian jemput stark kucing baru vani hadiah ulang tahun di Bandara Sultan Mahmud Badaruddin II Palembang..

hari minggu tanggal 23 juli jam 7, gw dijemput di Prabu sedangkan yang lain berangkatnya jam 5.30 dari Muara Enim, hari itu gw pake dress bikinan gw sendiri.. pengennya dress kayak velvetnya kivitz tapi jadinya jauh banget dari nyaman..tapi cukup senanglah..hihihihihi

rencananya mau belanja bahan kebaya, kalau aq belinya bahan velvet mau bikin dress...tapi setelah dilokasi cuma ada 2 warna yang aq suka..cari bahan kaos ngak ada di Megaria..trus kami beli bahan kerajinan..ibu defri beli bahan bahan acralyc kalau gw beli buat bahan bros handmade...

pas lagi pilih pilih bahan kerajinanan eee diseberang ada bucherri yang lagi diskon..ooooo mata langsung kalap....akhirnya buccheri ngak dapat, dapatnya viari warna putih ukuran 36 (masih kebesaran)..


setelah semua tujuan sudah dapat saatnya ngabisin uang kecil..wkwkwkwkwk


kecapean...


ngeliat foto foto ini....koment gw untuk diri sendiri...gennduuttt...

Kamis, 20 Juni 2013

My handmade tutorial - How to make flower fabric brooch


My handmade tutorial - How to make flower fabric brooch


sumber : http://busymitts.com/project/craftygirlada2012/37933_My-handmade-tutorial-How-to-make-flower-fabric-brooch

How to make an origami Liberty fabric brooch


How to make an origami Liberty fabric brooch


A while back I had learned to make origami lotus flowers at an event at our local botanic gardens and was inspired to make fabric ones into pincushions - you can see my tutorial here.

How about brooches?!


I'm so pleased with them - but you probably can't go wrong with Liberty. I thought they might make good stocking fillers/teacher presents, or how about using them to embellish a bag or purse?

The technique is pretty similar to my pincushions, but here is how I made them. I am sure that there are many ways that this could be perfected - if you think of anything, please do let me know.

Please forgive the terrible lighting (I can't wait until the sun is shining again - when this will be is anyone's guess), and the not very professional paint all over my hands - I've been painting bookshelves.

You will need:
Two 5" liberty charm squares (this gives you a brooch at around 2" - a smaller square would be possible, but very fiddly - of course you could make a bigger one, like my pincushions)
A piece of Bondaweb/Wonder Under the same size
A piece of felt approximately 2" square
A brooch fitting
A bead or button of choice

1. Here are my two Liberty squares, and square of Bondaweb.


2. The Bondaweb has a rough side - the gluey side - and a paper side. Place the Bondaweb on top of one Liberty square, glue side down, and fix in place by ironing.


3. Carefully peel away the paper, and discard. You should now have a residue of glue on your Liberty square. Place the second one on top. (Obviously not offset, which I did here for clarity!)


4. Iron in place, and you should now have a double-sided Liberty square which is more responsive to folding. You could perhaps use thicker fabric, one square only, and starch it (I haven't tried this as I wanted to use Liberty lawn - if you do, let me know!)


5. Trim up your square, to make sure it is true.


6. Fold on the diagonal and press lightly to leave a mark.


7. Do the same on the other diagonal, so that you have found the centre point.


8. Now, one by one, fold the corners into the middle, pressing them into place with your iron.


9. Again, take the corners and press them into the middle. The square is getting smaller, so I'm holding it in place with the point of my scissors, so you can see.


10. Turn it over.


11. Now once again, fold the corners into the middle. The result should look like this, with some neat folds.


and the other side will look like this, with four flaps..


12. Turn back over...


...then reach round and take hold of the point of one of those little flaps and gently pull it upwards until it looks like this. Hold the fold in place with your thumb like this while you do it.


12. Repeat with all four flaps...


...until you have this.


13. Carefully holding them in place, turn your piece over. Four more flaps remain at the back. Just open them out...


...so that the corners of them show in front like this.


14. Sew a button or bead of your choice to the centre, which also holds the folds in place:


A fabric-covered button would look fab!

For a different look, omit step 13, which gives you a simpler flower.


15. Seal any raw edges with clear nail varnish, or Fray Stop.


16. Now sew your square of felt to the back, attach your brooch fitting, and Bob's your uncle.

Tweaks:

I made two versions of this brooch. One used two squares of Liberty, and the other used a square of Liberty backed with a white cotton sheeting. You can catch a glimpse of white in between the folds at the back, but they are not visible on the front, and it made for a slightly more substantial brooch,

If you want something waterproof you might try Mod-Podging the result.

Would you like to try making one, and let me know if these instructions are clear? If you are a follower, just let me know in the comments section if you would like one and I will send the first three people a little kit. Let me know your favourite two colours, and I'll try and oblige from my Liberty stash, though I can't promise! They are fun to make, and rather addictive.


Sumber : http://www.knottedcotton.com/2012/11/how-to-make-origami-liberty-fabric.html